Editing backgrounds in images can elevate your visuals, making them more professional and eye-catching. Whether you’re refining product photos, enhancing portraits, or creating unique graphics, mastering background edits is essential. In this guide, we’ll walk you through a step-by-step process to effortlessly achieve flawless background edits.
Step 1: Choose the Right Editing Tool
Selecting the right software is the foundation of seamless background editing. Popular options include Adobe Photoshop, Canva, and GIMP, each offering unique features for different skill levels. If you’re looking for a quick and hassle-free option, you can remove background from image online with Adobe Express, which simplifies the process with AI-powered automation.
Step 2: Use the Right Selection Method
Once you’ve chosen your tool, the next step is accurately selecting the subject. Depending on the software, you can use different selection techniques:
- Magic Wand Tool – Best for high-contrast images where the subject stands out from the background.
- Lasso Tool or Pen Tool – Ideal for precision cuts, especially when dealing with intricate edges like hair.
- AI-Powered Auto Selection – Some tools offer automated selection for faster and more efficient results.
Step 3: Refine the Edges for a Natural Look
One of the biggest challenges in background editing is ensuring smooth, natural-looking edges. Use feathering, anti-aliasing, or the refined edge tool to soften any harsh cutouts. In Photoshop, the ‘Select and Mask’ feature helps blend the subject seamlessly.
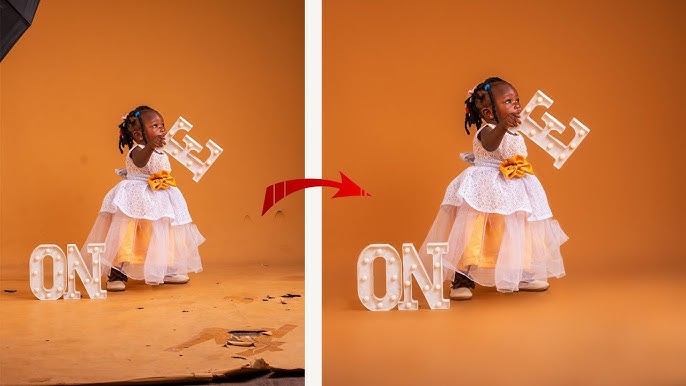
Step 4: Replace or Adjust the Background
After successfully removing the background, decide on the next step:
- Transparent Background – Perfect for logos, PNG files, or e-commerce product listings.
- Solid Color Background – Common in professional headshots or branding materials.
- New Background Image – Allows creative compositing by adding a different background that enhances the overall aesthetic.
Step 5: Adjust Lighting and Shadows
To make your subject blend naturally with the new background, adjust lighting and shadows. Use the following techniques:
- Match the brightness and contrast of the new background.
- Apply soft shadows to maintain depth and realism.
- Use gradient overlays to create a seamless integration between the subject and the background.
Step 6: Final Touch-Ups and Exporting
Before finalizing, zoom in to check for any imperfections. Remove any remaining color fringing or sharp edges using the blur or smudge tools. Once satisfied, export your image in the desired format – PNG for transparent backgrounds or JPEG for high-quality compressed files.
Mastering background edits takes practice, but with the right tools and techniques, you can achieve flawless results. Whether you’re a photographer, graphic designer, or content creator, refining your background editing skills will enhance your visual storytelling. Start practicing today and transform your images like a pro!